Versions
Documentation for ChromeOS and Kernel Versions, as well as recovering.
Depending on your ChromeOS version, you may or may not be able to use some kajigs.
Determine your ChromeOS version
Section titled “Determine your ChromeOS version”- Open Settings in ChromeOS
- Go to
About ChromeOS - Note the characters before the first
.as your version. (Ex: v132)
How can I downgrade/recover my Chromebook?
Section titled “How can I downgrade/recover my Chromebook?”What versions can I Recover to?
Section titled “What versions can I Recover to?”On an unmodified device, you can recover to any version within the range or newer than your current version.
| Kernver | ChromeOS Versions |
|---|---|
| 0 | Bugged (any version) |
| 1 | <=r110 |
| 2 | r111-r119 |
| 3 | r120-r124 |
| 4 | r125-r131 |
| 5 | r132-r137 |
| 6 | r138-r143 |
| 7 | >=r144 |
How do I check what Kernver I have?
Section titled “How do I check what Kernver I have?”- Press [Esc+Ref+Pwr] to enter recovery mode
- Press [Tab] to see Debug info, as shown in the screenshot below
- Look for TPM, specifically the last digit of
kernver. Below is an example of a device with Kernver 3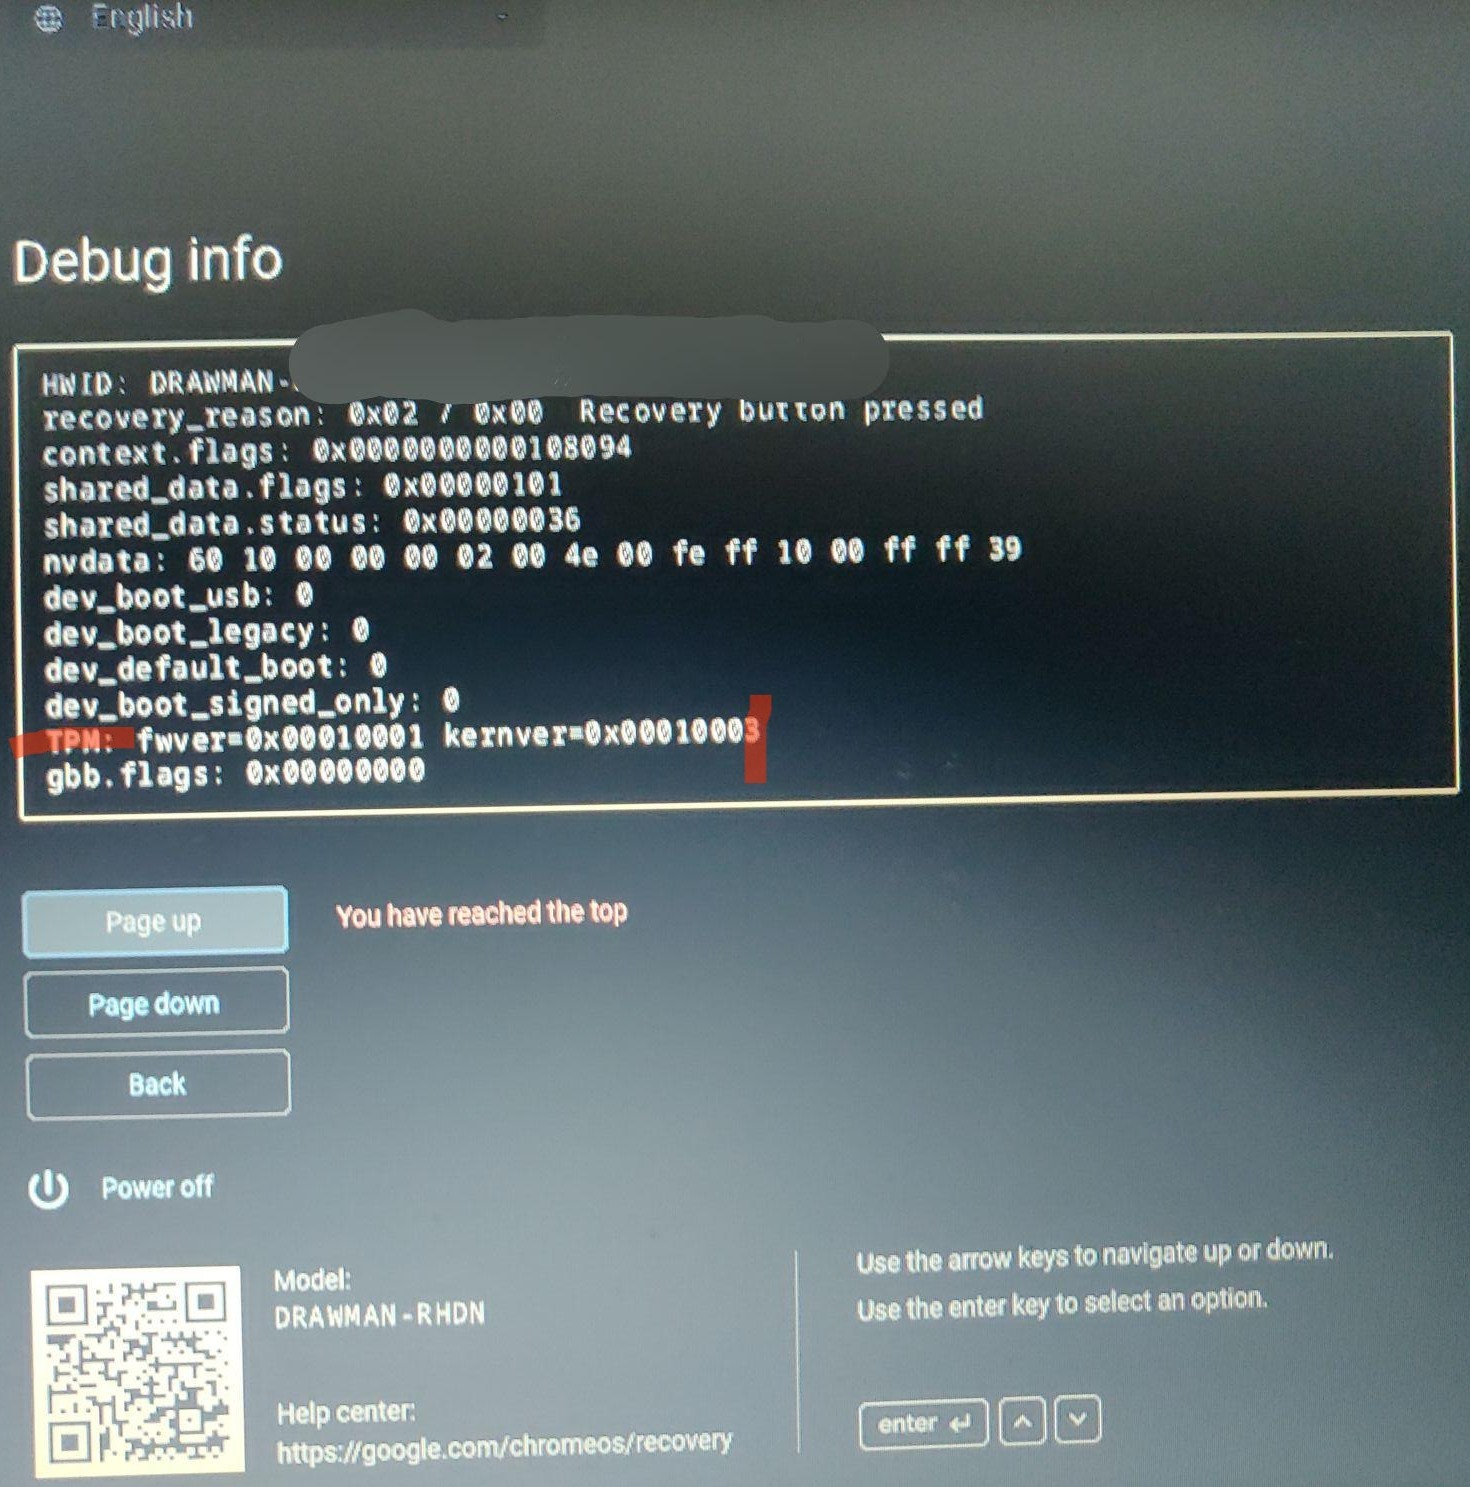
- Cross-Reference the chart above to see what you can recover to
Requirements
Section titled “Requirements”- USB drive (8 GB+)
- One of the following: Chromebook Recovery Utility (ChromeOS, Windows, MacOS),
dd(Linux/macOS/POSIX-compliant), or balenaEtcher (Linux, MacOS, Windows)
Find your board name
Section titled “Find your board name”- Open
chrome://versionon your Chromebook - Find Platform: row — the word after
stable-channelis your board name (e.g., reven)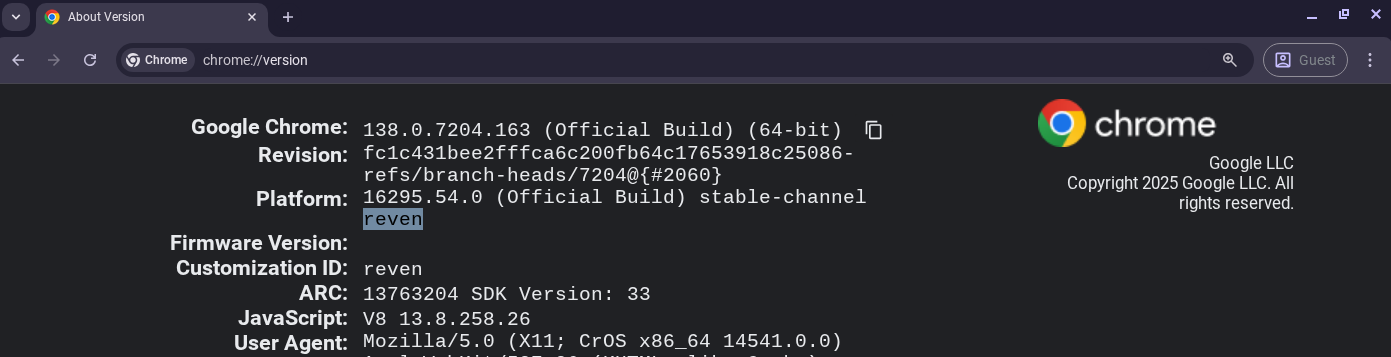
Downloading a recovery image
Section titled “Downloading a recovery image”- Visit cros.download and click “Recovery Images”.
- Search for your board name and click the board name in the table.
- Find the version you want and click the link in the download column.
Flash image to USB
Section titled “Flash image to USB”Option 1: Using dd (Linux/macOS/POSIX-compliant):
Section titled “Option 1: Using dd (Linux/macOS/POSIX-compliant):”- Unzip the
.zipfile either through GUI, or through a command likeunzip - Identify your USB device by running
sudo fdisk -l(Linux) or using macOS Disk Utility. It should say something likeDisk /dev/sd...(Linux) and in macOS open Disk Utility, select it under “External” and you should seeDevice:. You will want to use/dev/INSERTTHATNAMEHEREinstead of/dev/sdX. Other OSes will have to see relevant documentation for identifying the proper USB device. - Write the image (replace
/dev/sdXand file path. Remember to use the unzipped file):
sudo dd bs=4M if=/PATH/TO/IMAGE.bin of=/dev/sdX conv=sync status=progressOption 2: Using Rufus (Windows only)
Section titled “Option 2: Using Rufus (Windows only)”- Download Rufus from GitHub and open it.
- Select your USB drive and file that you want to flash (zip files are automatically unzipped).
- Click “START” and continue through any warnings.
Option 3: Using Chromebook Recovery Utility (Windows/macOS/Chrome OS) (unreliable):
Section titled “Option 3: Using Chromebook Recovery Utility (Windows/macOS/Chrome OS) (unreliable):”- Install Chromebook Recovery Utility
- Open it (click on the extension icon from the puzzle piece)
- Click the gear icon → “Use local image”
- Select the
.zipfile - Choose your USB drive and create the recovery USB
Recover ChromeOS
Section titled “Recover ChromeOS”- Enter recovery mode: Esc + Refresh + Power
- Insert recovery USB
- Follow prompts to reinstall Chrome OS
- Remove USB when done. You can wipe it in Chrome OS Recovery Utility with gear icon → “erase recovery media”. You can
mkfs.ext4on the block device in Linux (on Mac use Disk Utility or CRU).